Supercharge Your Email Stack: Natural Language Automation with Nuntly MCP Server
Learn how Nuntly MCP Server and Cloudflare MCP Server enable natural language automation for email onboarding, DNS setup, and sending emails, making developer workflows faster and easier in 2025.
The pain point
When you onboard a new email provider, you often face a daunting array of tasks: setting up sending domains and configuring DNS records, managing webhooks, and more. This process can be time-consuming and error-prone, especially if you're not familiar with the DNS intricacies. You know the drill: new email provider signup means 20 minutes of copying DNS records between dashboards, praying you didn't miss a character in that 2048-bit DKIM key... because one typo can delay DNS propagation by hours or days. Copy/pasting each records type, name, value into your DNS records is tedious and error-prone. Yeah we know, because we did it too ;)
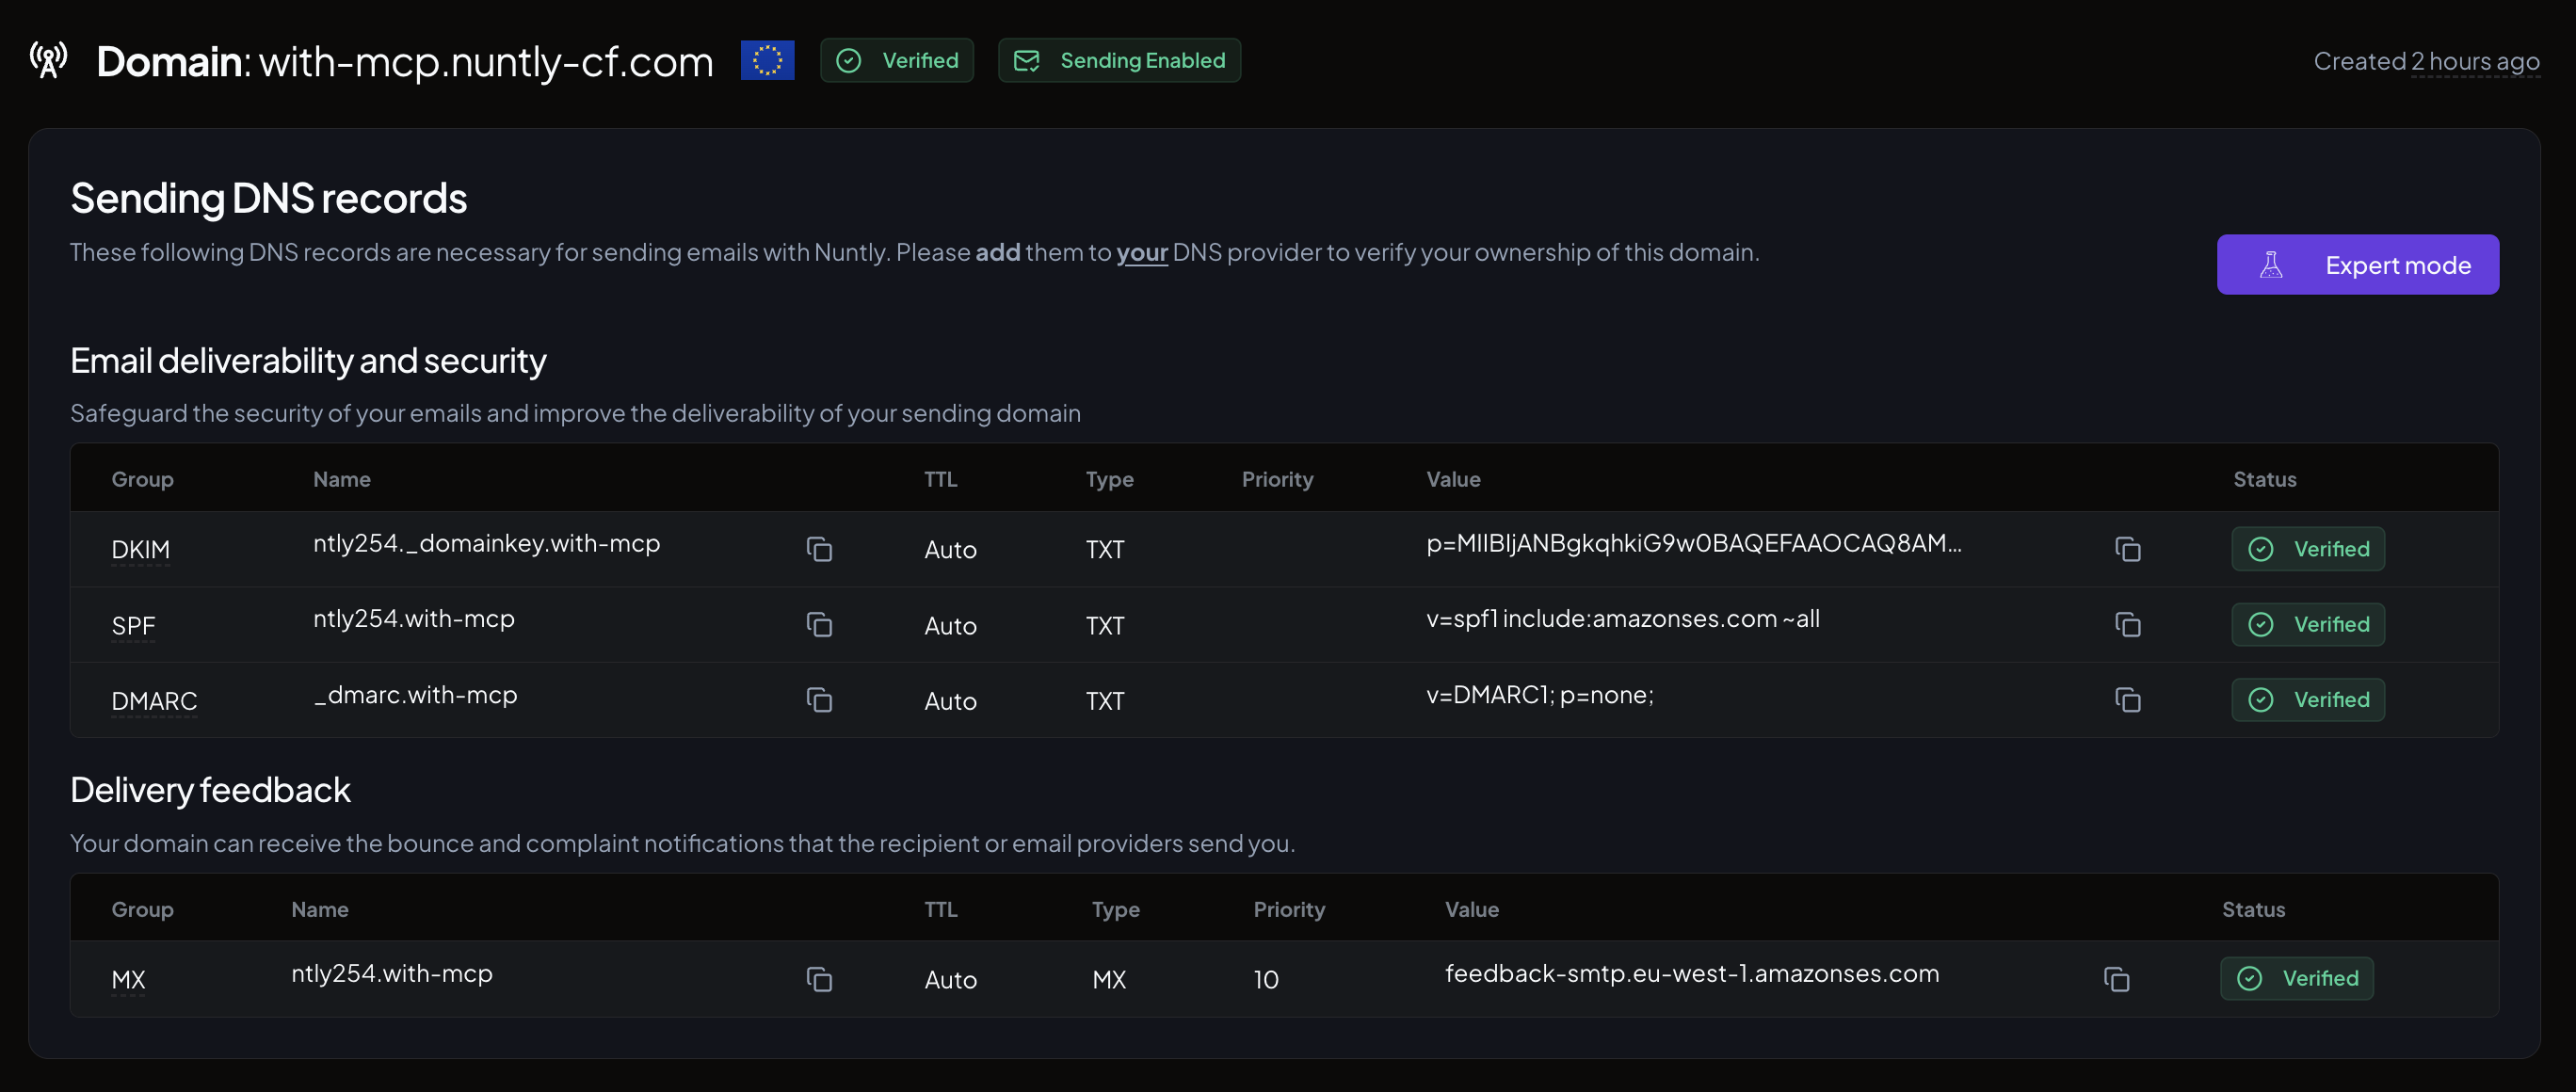
At Nuntly, we wanted to make this process as seamless as possible, so we introduced an Export Mode that simplifies the creation of all DNS records in a DNS zone format.
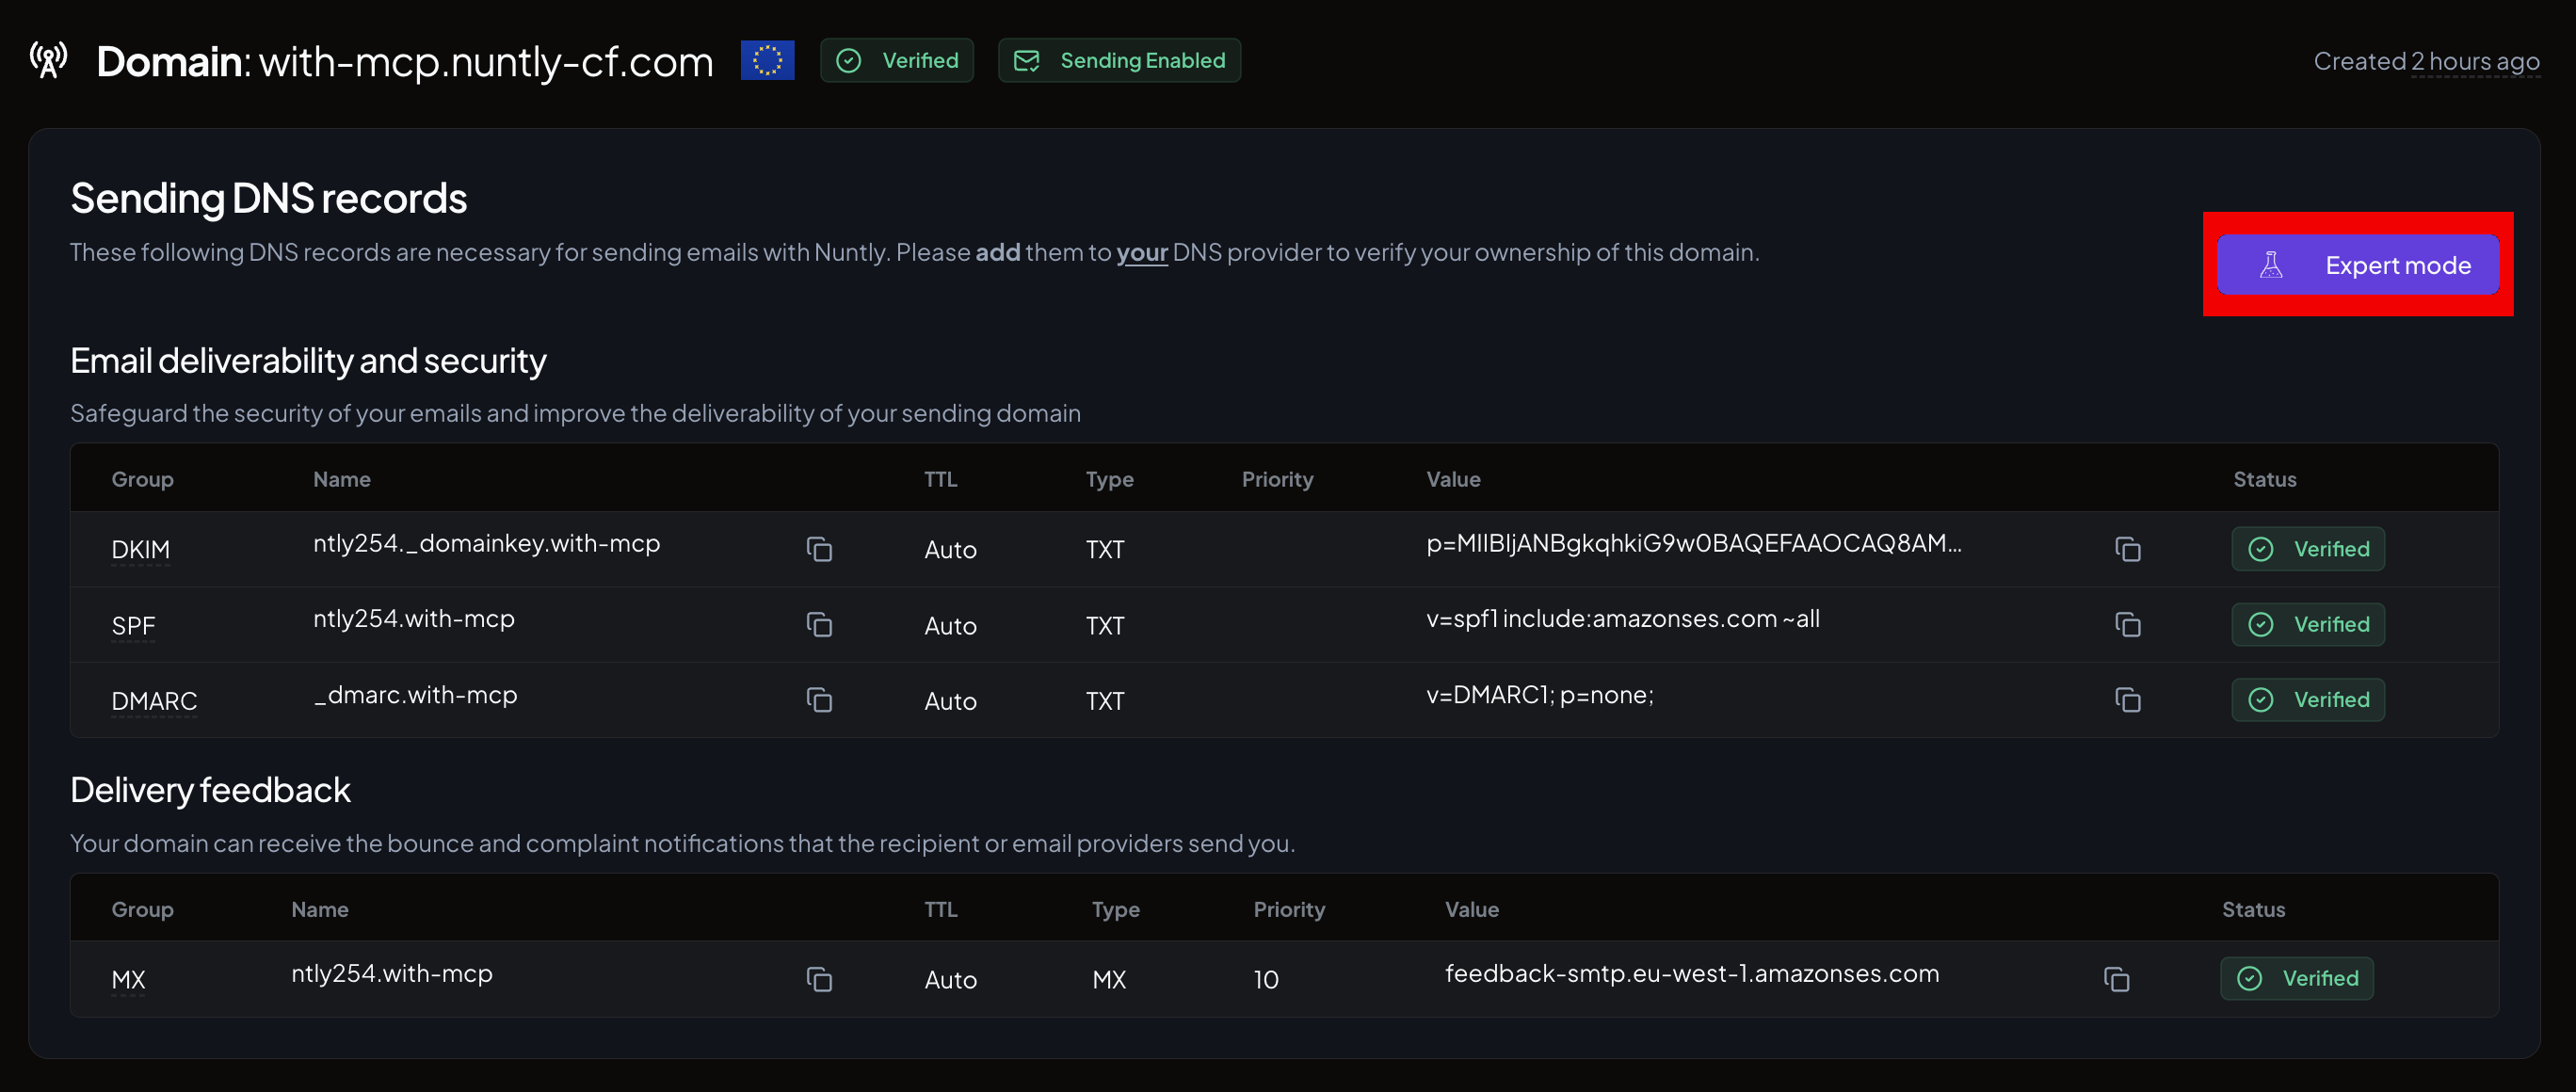
You have to only copy/paste (or import) the DNS records directly in your DNS provider zone. It looks like this:

This speeds up the process, and reduces the risk of errors, but we wanted to make it even easier.
What if you could skip all this copy-paste hell and just say: 'Set up my-app.com for sending emails with Nuntly'?"
To improve this experience, we built a tool that allows you to interact with Nuntly's platform using natural language. Imagine configuring domains, webhooks, api keys, sending emails, sending invites to join your organization,... just by describing what you want, making Nuntly's platform even more intuitive and accessible for developers and non-developers alike.
It's called a MCP Server and you can interact using natural language, just describe what you want, and your favorite AI client does the rest.
In this post, we’ll break down what an MCP Server is, why it’s relevant for developers in 2025, and how Nuntly’s MCP Server can help you to the fastest onboarding in Nuntly with the help of Cloudflare DNS.
What is an MCP Server?
An MCP (Model Context Protocol) Server is a modern server that enables applications to interact using natural language and structured APIs. Instead of traditional integrations, it allows you to describe your intent (such as sending emails, configuring domains, or managing webhooks) in natural language. The server interprets these requests and translates them into actions, making interaction more intuitive and accessible.
Why MCP Servers Matter in 2025
In 2025, AI-powered tools like ChatGPT, GitHub Copilot, and Claude are transforming how developers build and interact with software. Developers expect seamless, natural language interfaces and automation in every aspect of their workflow. MCP Servers are at the heart of this evolution, acting as a bridge between your favorite AI client and platforms like Nuntly.
With Nuntly’s MCP Server, developers can use AI clients to describe tasks (such as configuring sending domains, creating webhooks, or replaying webhook event notifications) in plain language. The MCP Server interprets these requests and translates them into actionable API calls, making development faster, more intuitive, and accessible to everyone.
By connecting AI clients directly to Nuntly’s platform, MCP Servers unlock a new level of productivity and developer experience, especially during the onboarding process.
Nuntly’s MCP Server: A Developer-Friendly Solution
Nuntly’s MCP Server is designed with developers in mind, offering a robust set of features and a seamless domain creation experience. Our comprehensive API provides access to all the features of our platform, so you can manage domains, webhooks, api keys, and more, all through natural language requests. This means you can interact with every part of Nuntly’s platform using your favorite AI client, making operations faster and more developer-friendly. Whether you’re automating onboarding, monitoring delivery, or managing API keys, Nuntly’s MCP Server puts the full power of our platform at your fingertips in a way that’s intuitive and efficient.
Let's see how it works in practice and how it can enhance your domain creation experience.
Use Case: Enhancing Domain Creation with Nuntly MCP Server and Cloudflare
Overview
The idea is to interact with Nuntly’s MCP Server using an AI client to streamline the process of setting up a sending domain and to create the necessary DNS records in Cloudflare in natural language. No need to learn the API, nor to configure a SDK, just describe what you want to do, and let the AI client and MCP Server handle the rest.
Step 1: Create a Nuntly Account
First, sign up for free a Nuntly account. And follow the steps to get started with Nuntly's platform, do not forget to copy the api key just created.
You should also have a Cloudflare account with a domain managed by Cloudflare and getting your Cloudflare API token and zone ID.
Step 2: Setting Up the MCP Servers
We are using VSCode with Github Copilot (but any AI client of your choice should work) to interact with Nuntly’s MCP Server.
Let's set up your development environment to work with Nuntly’s MCP Server. Follow these steps:
- Set up GitHub Copilot in VS Code.
- Create a new file named .vscode/mcp.json in your project directory
The mcp.json file defines how your MCP client connects and configures MCP servers, specifying commands, arguments, and environment variables.
{"servers": {"nuntly-mcp-server": {"type": "stdio","command": "npx","args": ["-y", "@nuntly/sdk-mcp@latest", "--tools=dynamic"],"env": {"NUNTLY_API_KEY": "<NUNTLY_API_KEY>"}},"cloudflare-mcp-server": {"type": "stdio","command": "npx","args": ["-y", "@thelord/mcp-cloudflare"],"env": {"CLOUDFLARE_API_TOKEN": "<CLOUDFLARE_API_TOKEN>","CLOUDFLARE_ZONE_ID": "<CLOUDFLARE_ZONE_ID>"}}},"inputs": []}
Replace the placeholders and use the following environment variables:
- NUNTLY_API_KEY with your actual Nuntly API key
- CLOUDFLARE_API_TOKEN and CLOUDFLARE_ZONE_ID with your Cloudflare API token and zone ID.
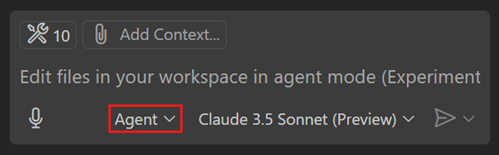
To use the agent in VSCode Github Copilot, enable agent mode in your GitHub Copilot chat.
Step 3: Let's Create a Sending Domain
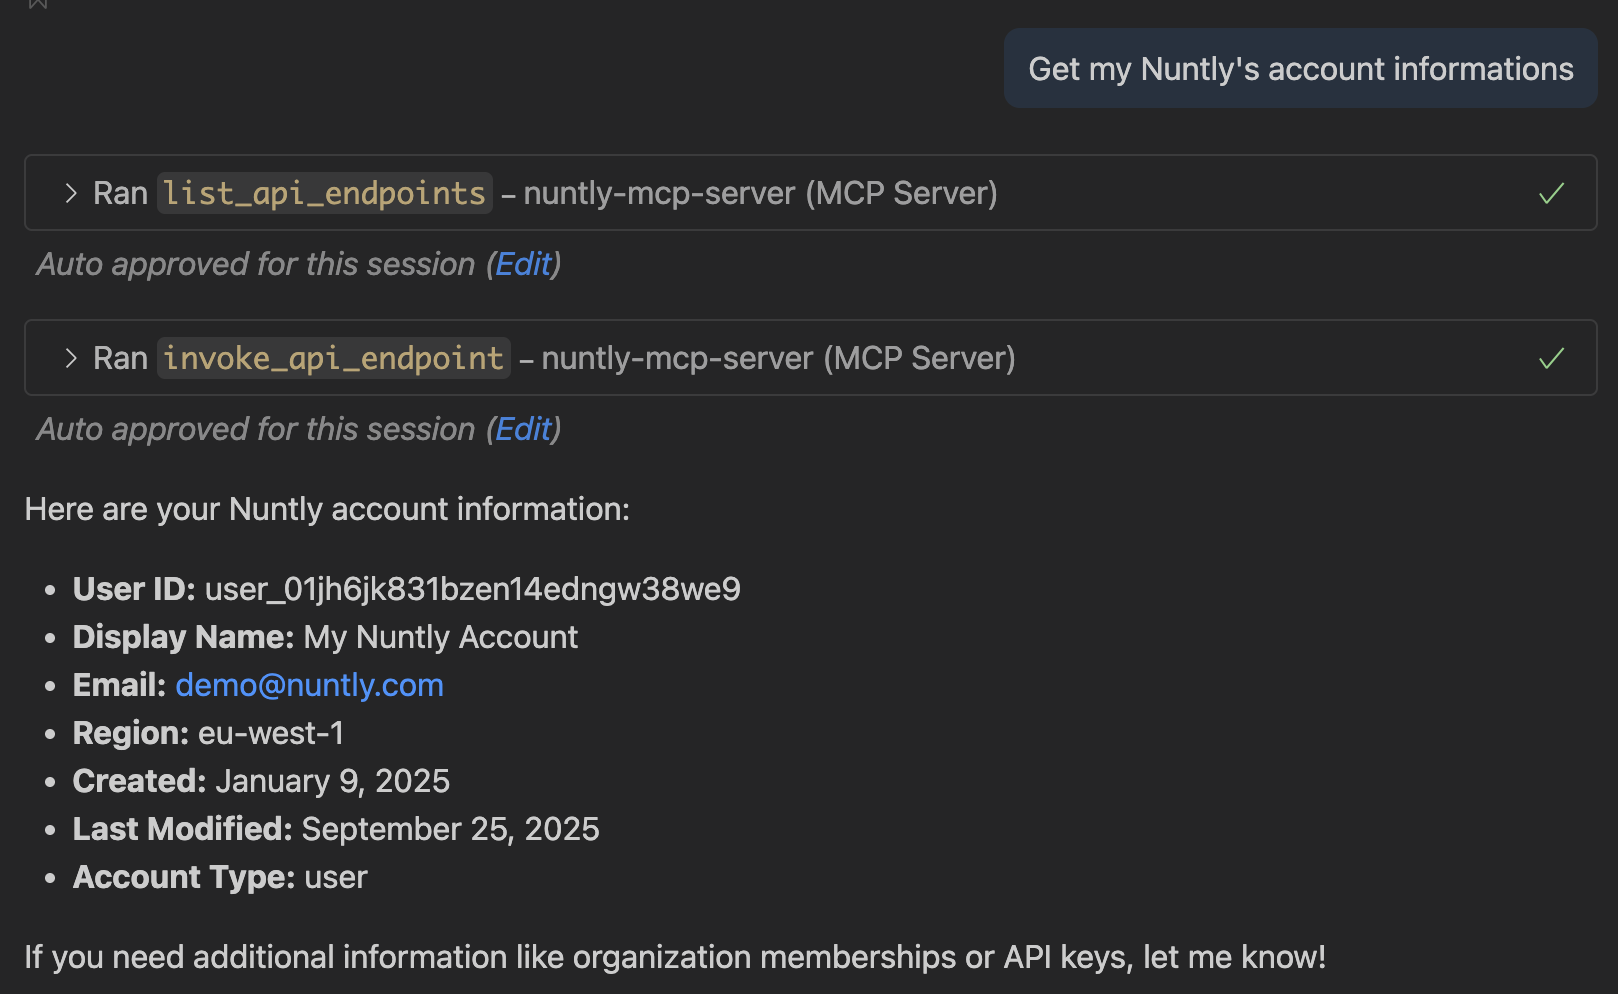
Check if everything is working by asking Github Copilot to get your Nuntly account information:
To be sure that the Cloudflare MCP Server is working too, let's start list the DNS records of your domain:
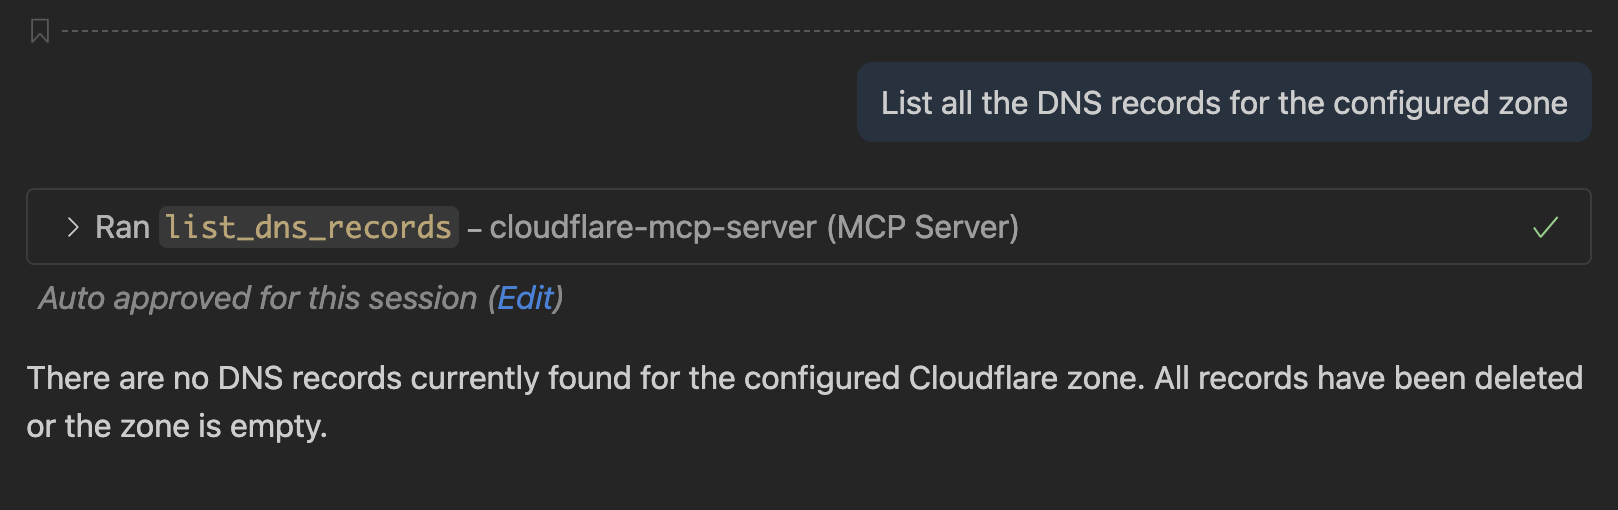
Everything is working as expected, let's create a sending domain in Nuntly and automatically set up the required DNS records in Cloudflare using natural language:
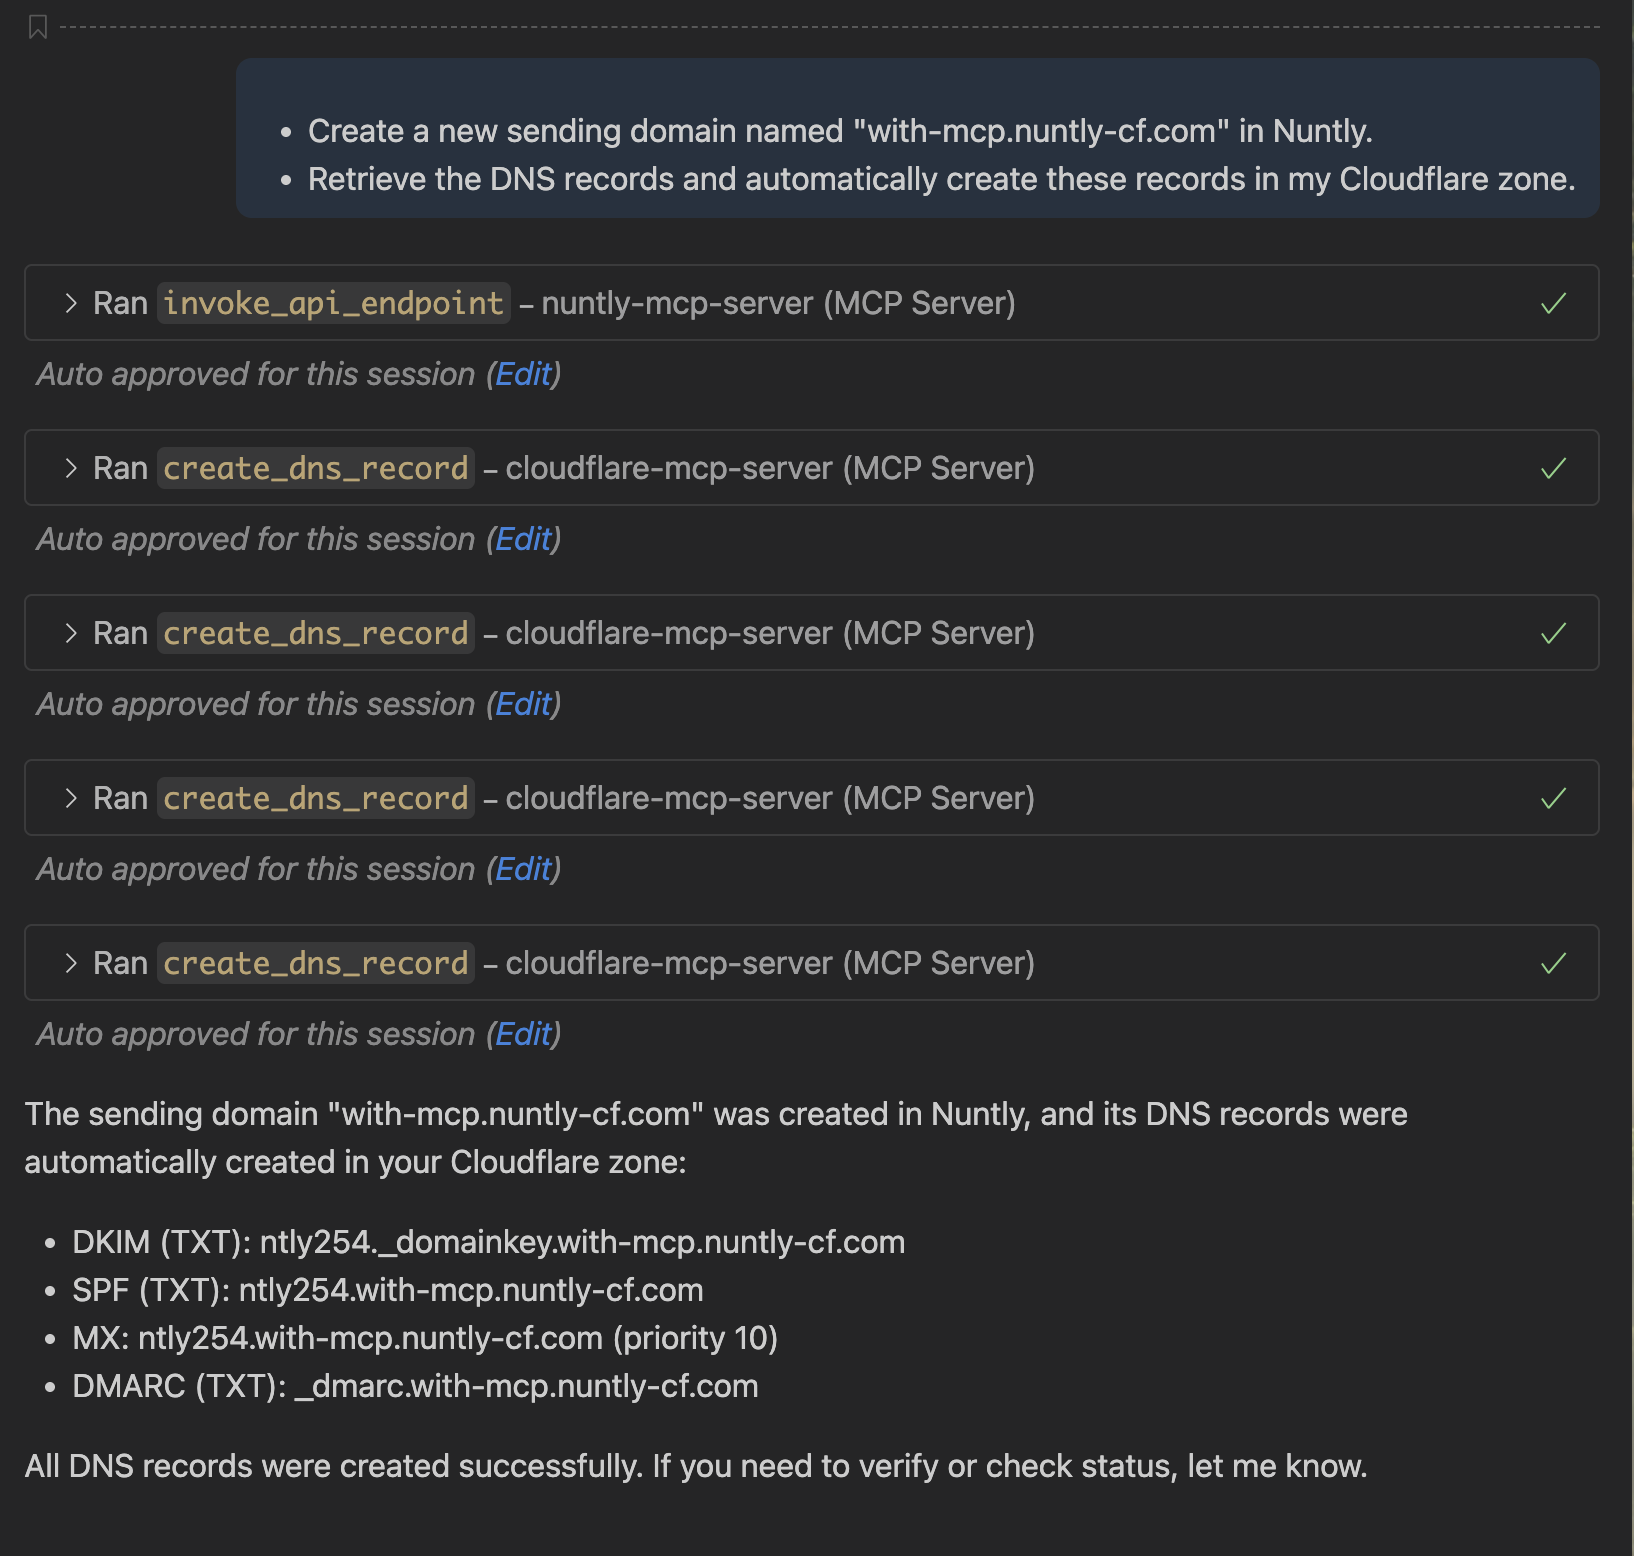
Yes you read it right, we just created a sending domain in Nuntly and all the required DNS records in Cloudflare in one single step, using natural language.

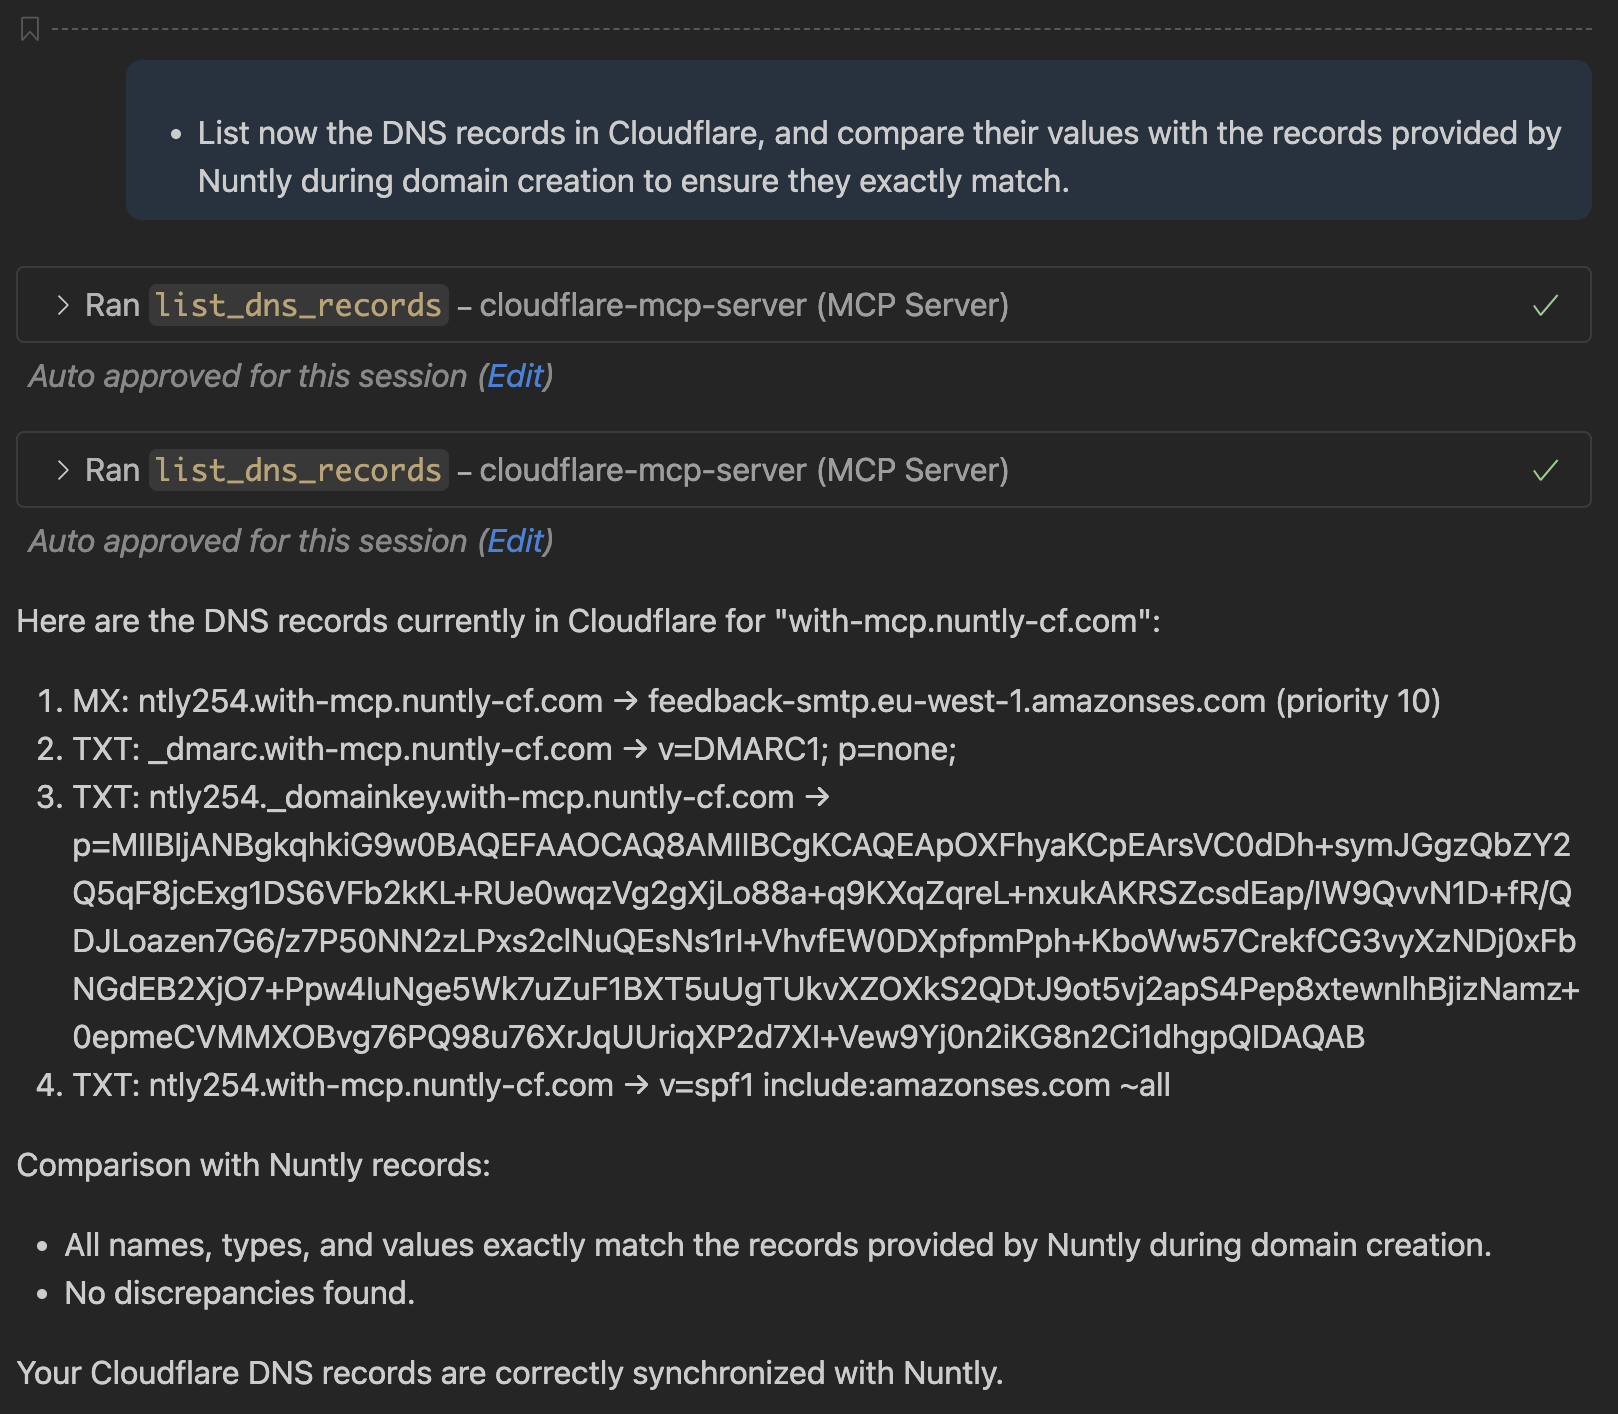
Let's list the DNS records for the domain with-mcp.nuntly-cf.com in Cloudflare, and compare their values to those provided by Nuntly during domain creation to confirm they match to ensure everything is set up correctly:
Wait for DNS propagation (this can take a few minutes), then verify the records in Nuntly:
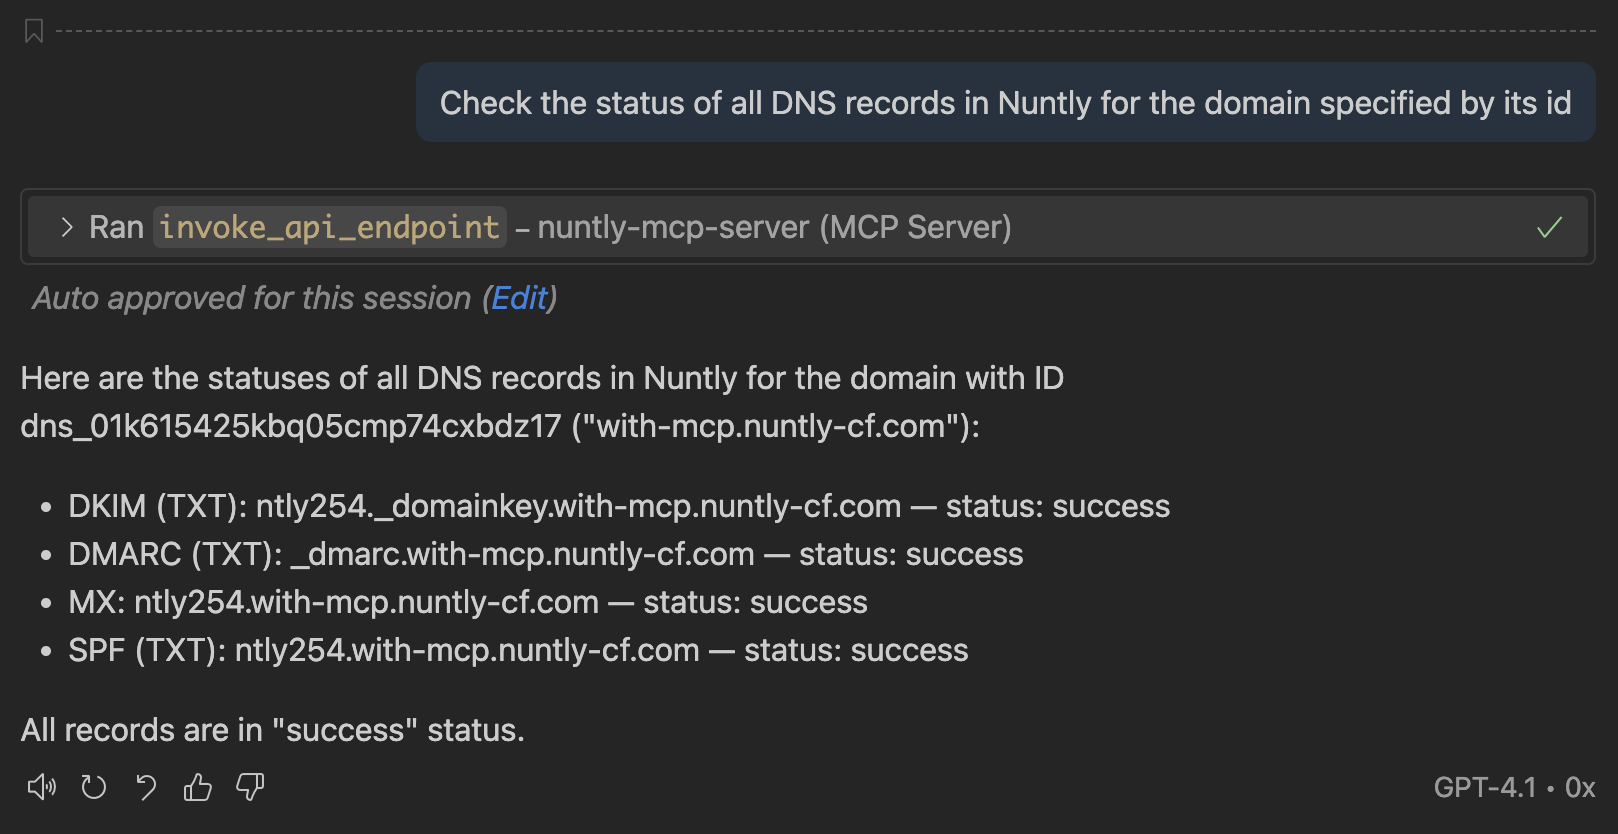
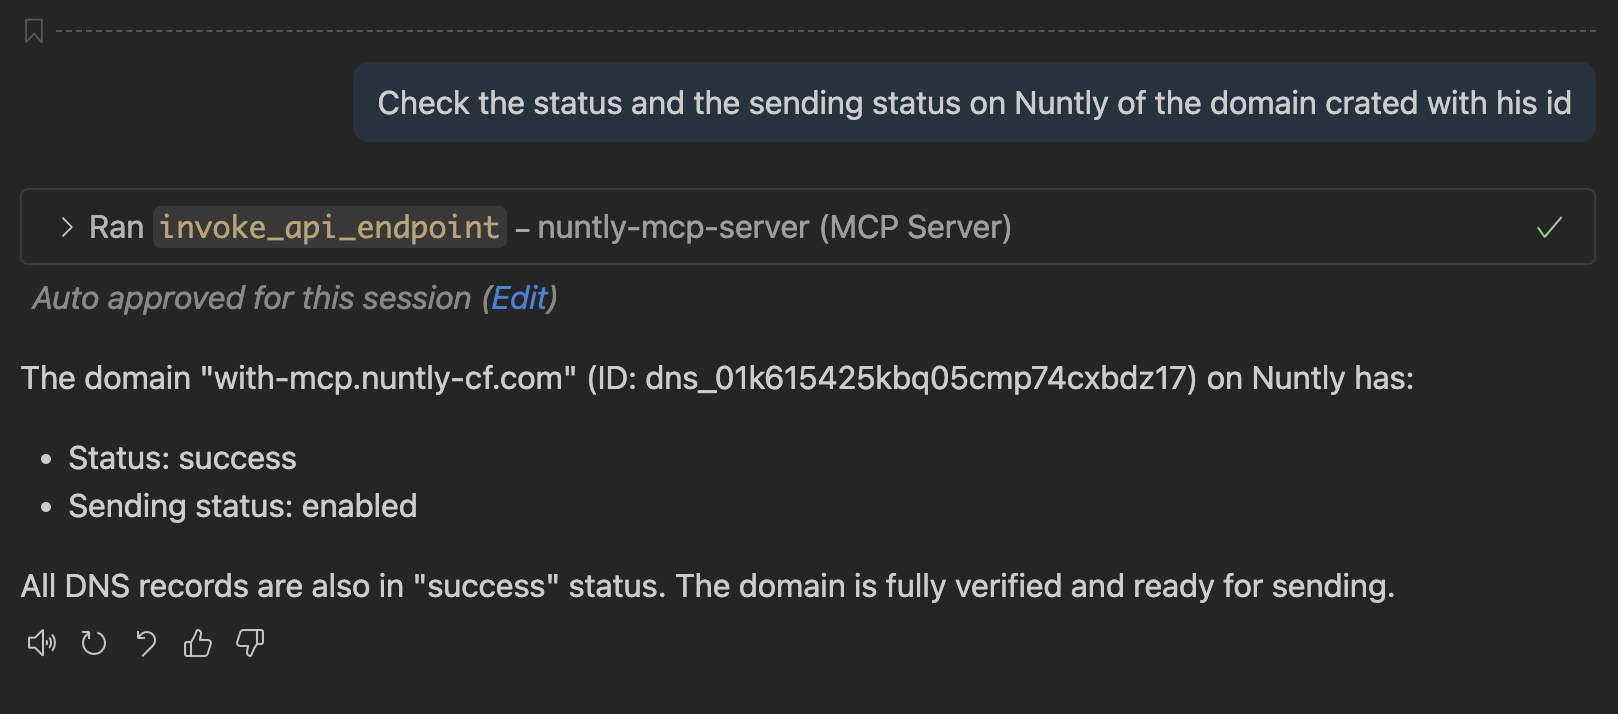
And you can also check the domain status and sending status:
Step 4: Sending an Email
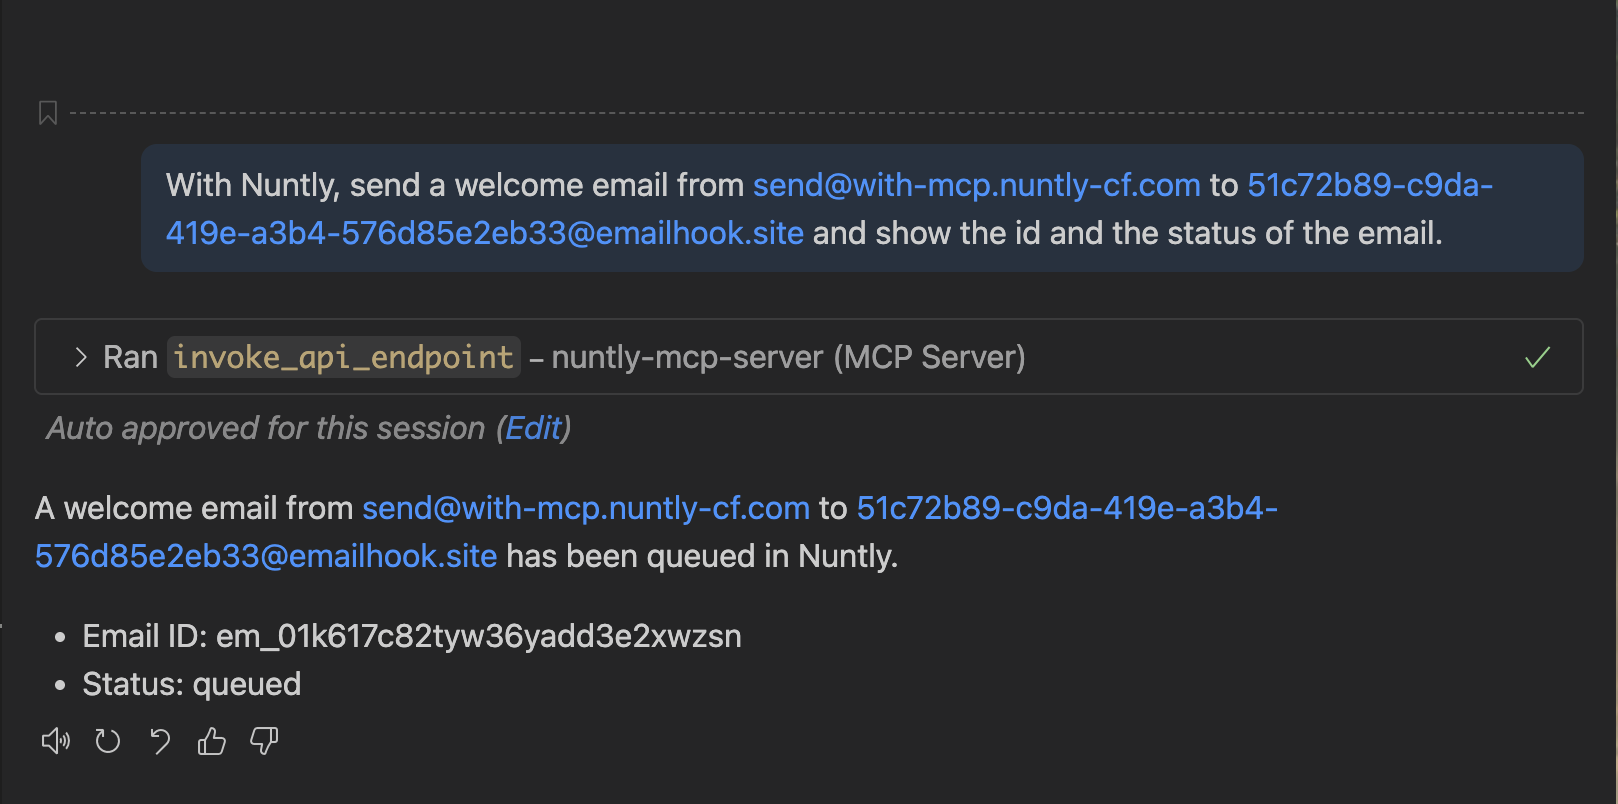
Now that we have our domain set up and verified, let's send a welcome email using Nuntly and Copilot.

And check the email delivery status:
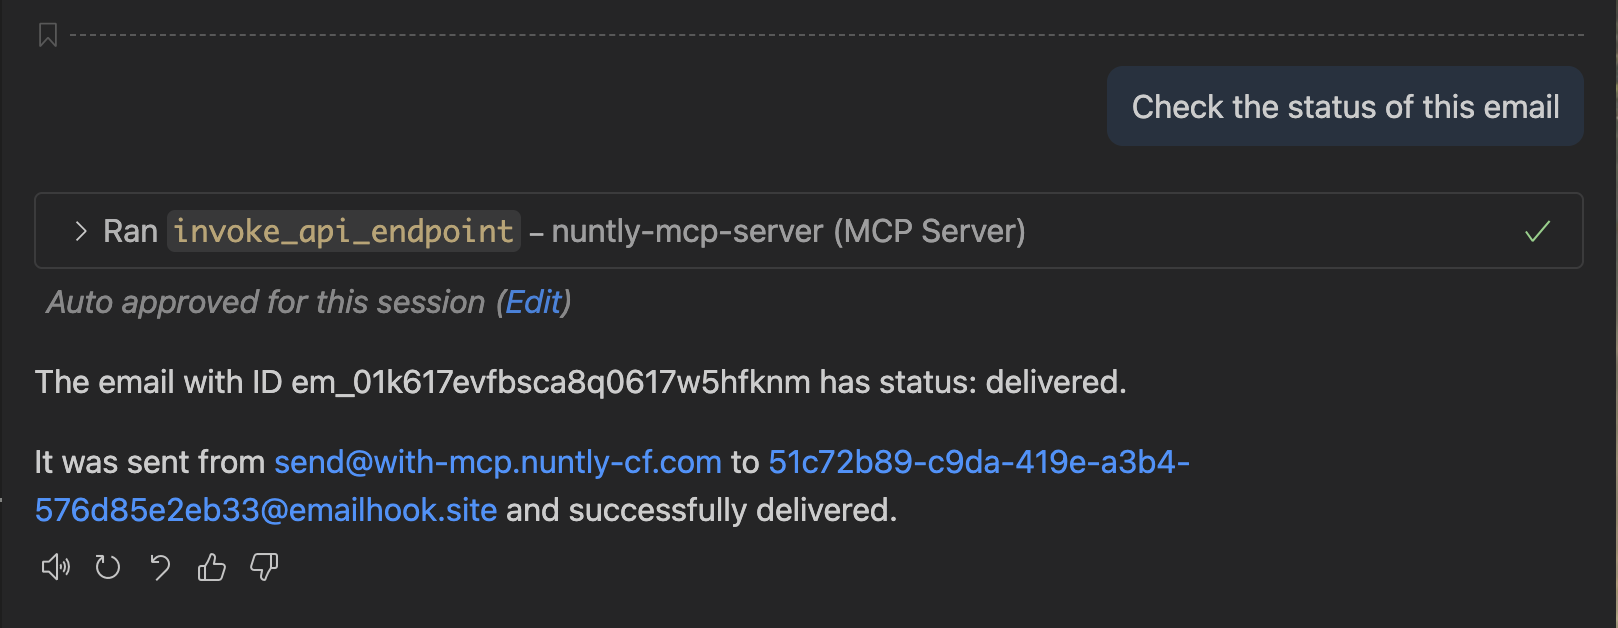
It was delivered successfully!
Take aways
- Nuntly’s MCP Server allows you to interact with Nuntly’s platform using natural language, making it easier and faster to manage your email stack.
- By integrating with Cloudflare’s MCP Server, you can automate the creation of DNS records required for domain verification, streamlining the onboarding process.
- and sending emails using Nuntly’s MCP Server and your favorite AI client is straightforward and efficient.
You are now ready to explore more features of Nuntly’s MCP Server and enhance your email management experience using natural language. Let's move forward to the next level of developer experience with Nuntly!
Next Step: Let's play with webhooks
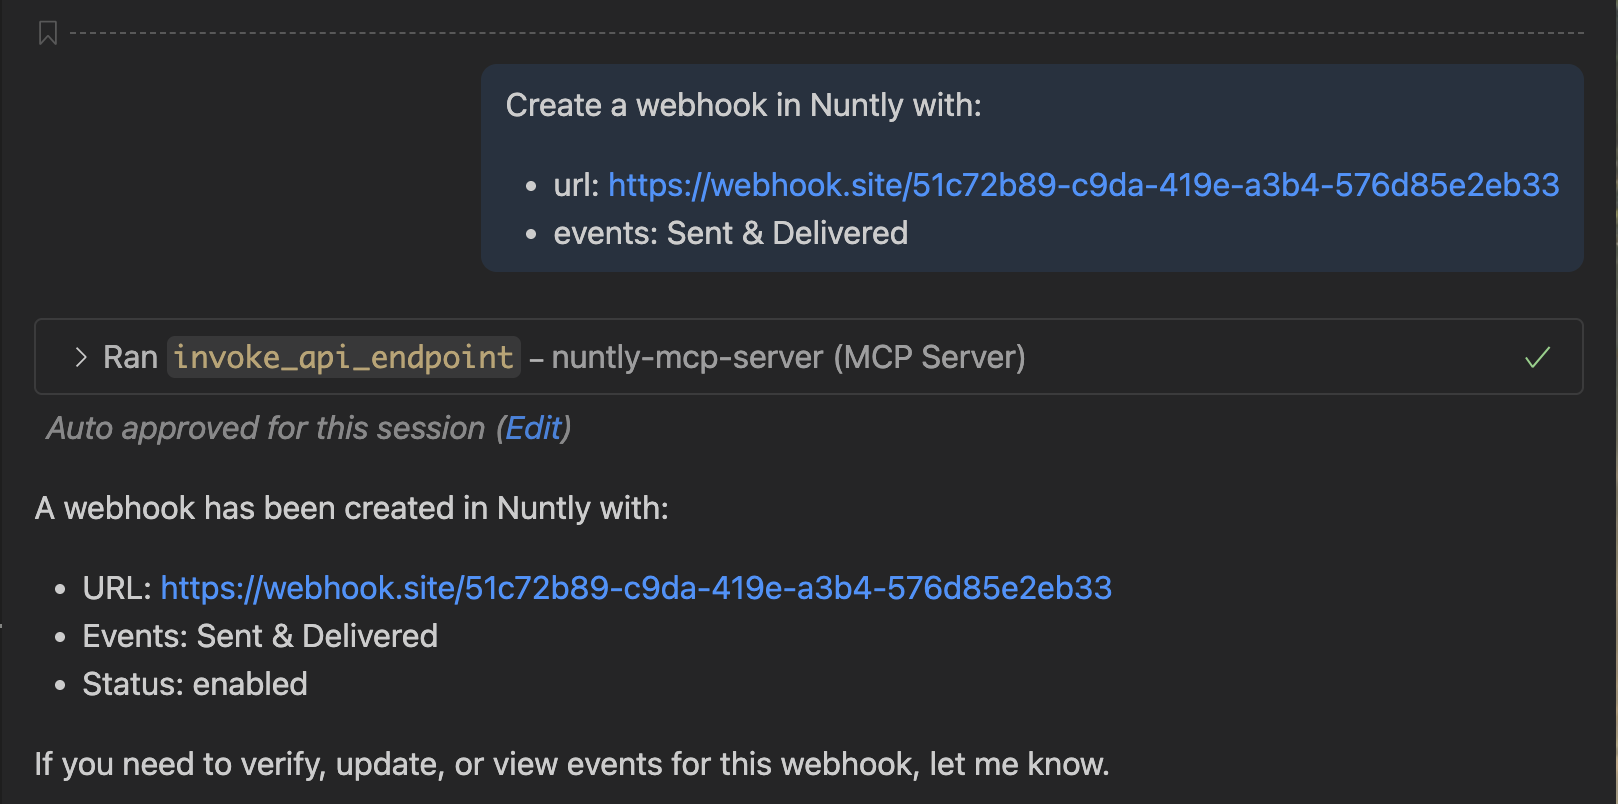
The goal here is to create a webhook in Nuntly and replay webhook event notifications using natural language. Let's create a webhook in Nuntly to receive event notifications for email sent and deliveries.
Now, send a test email to trigger the webhook:
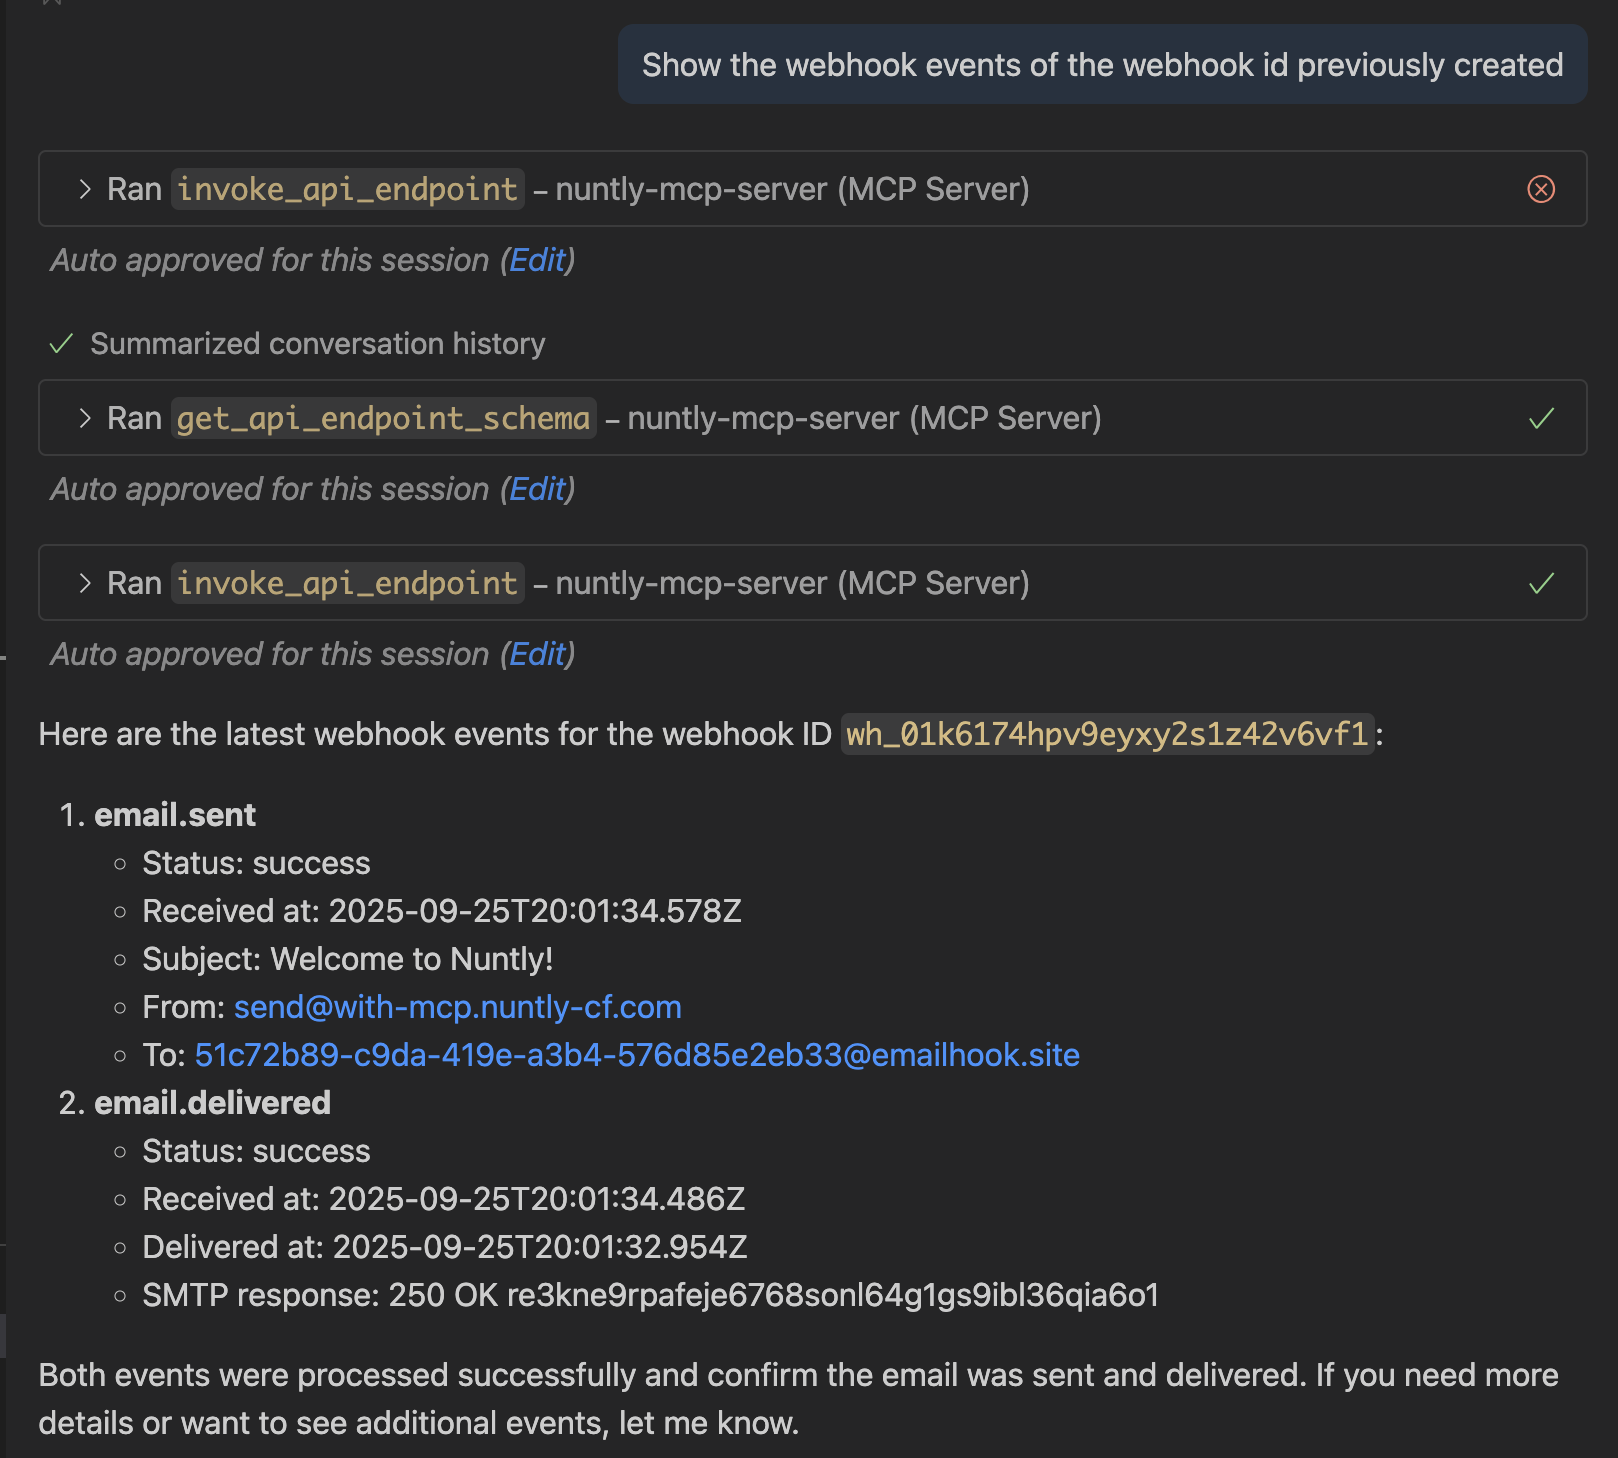
Let's check the webhook events deliveries:
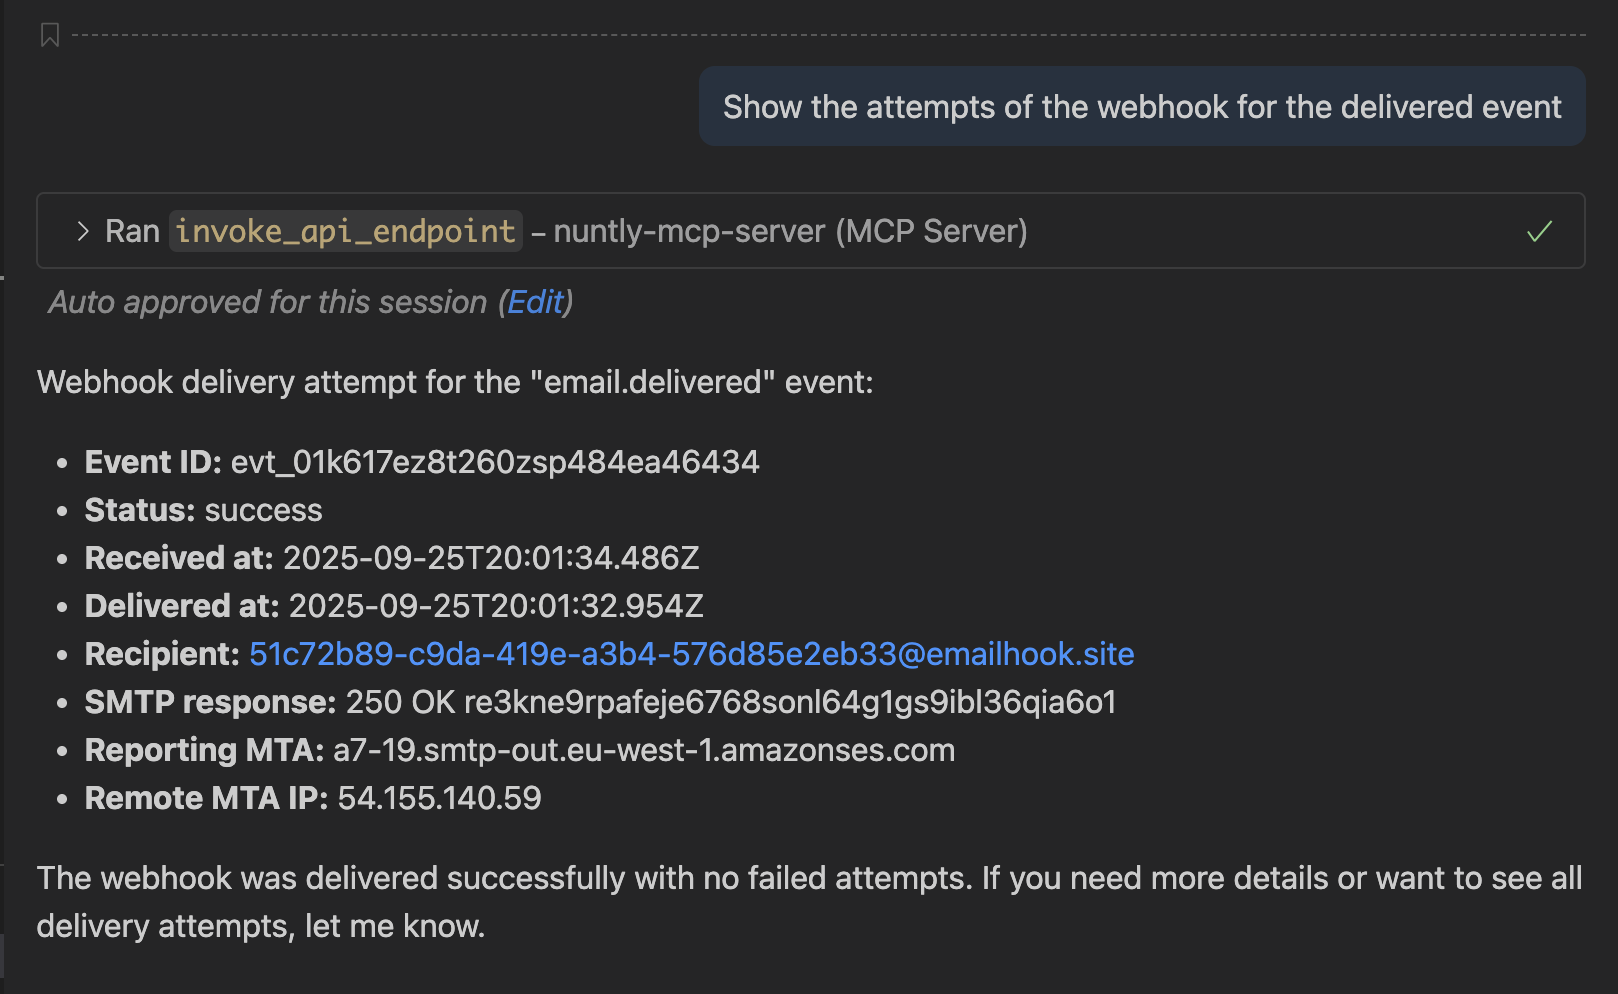
And we can verify the deliveries attempts for the delivery event:
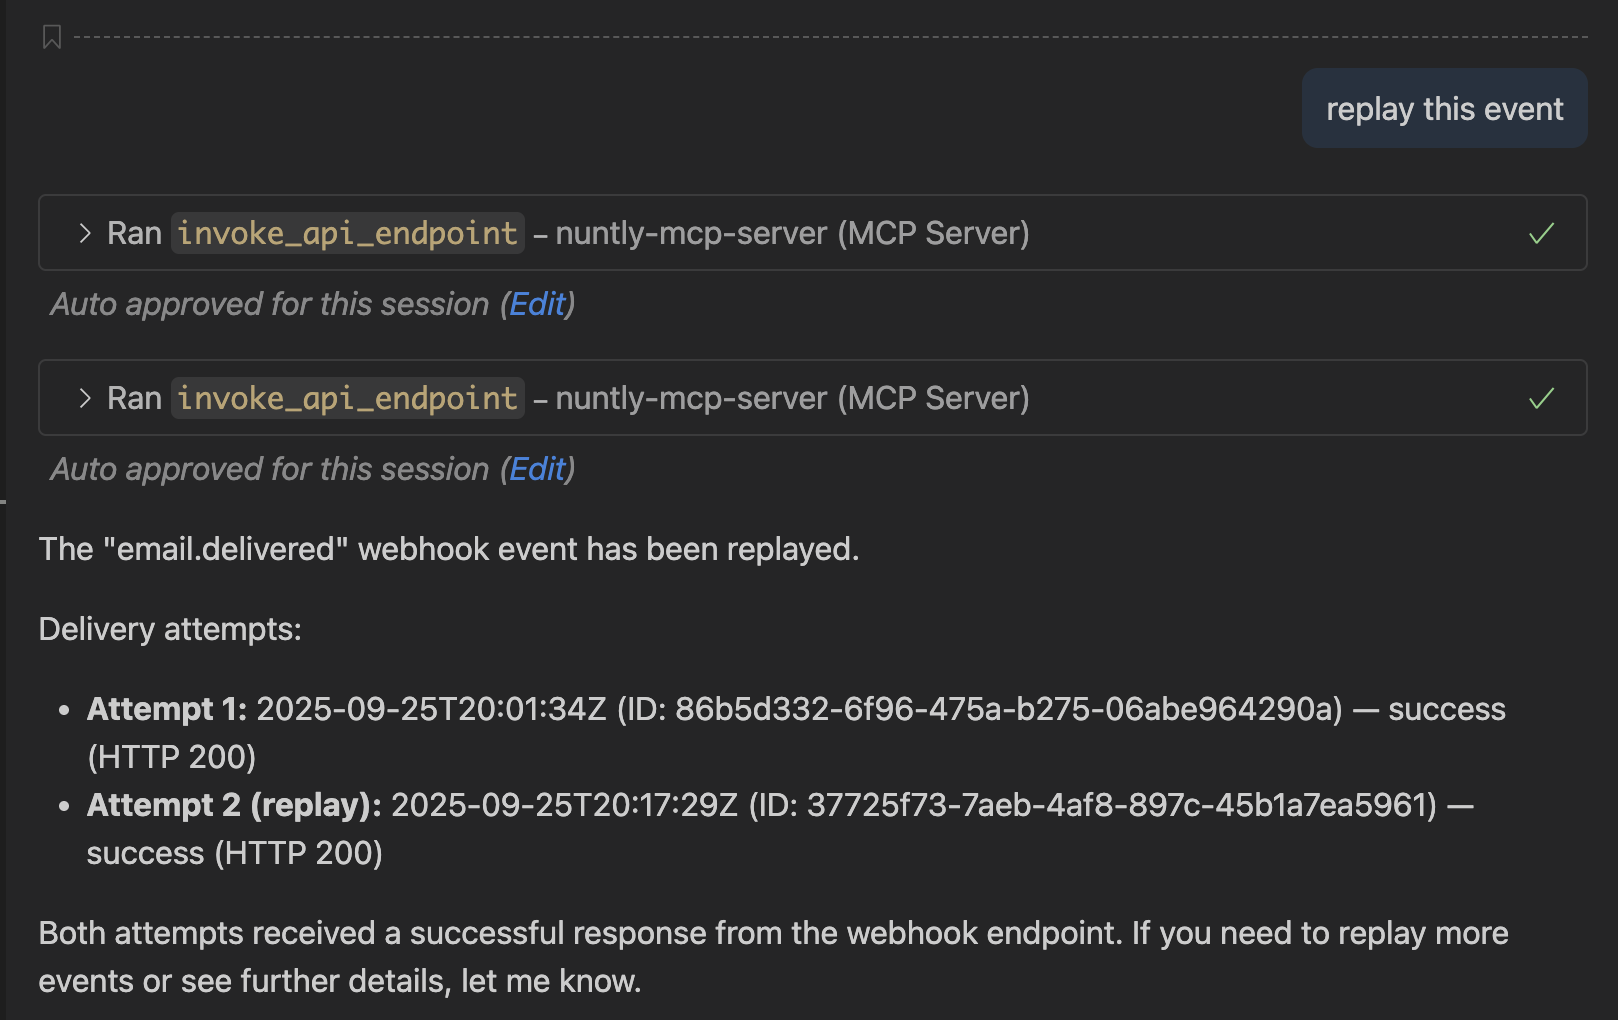
For the fun of it, let's replay this delivery event for this webhook:
Conclusion
Nuntly’s MCP Server is a powerful tool that enhances the developer experience by allowing natural language interactions with Nuntly’s platform. By integrating with Cloudflare’s MCP Server, we streamlined the domain creation process, reducing domain setup by 95% and eliminating DNS copy/paste errors. This approach not only simplifies onboarding but also empowers developers to manage their email stack efficiently using their favorite AI clients.
Why Developers Choose Nuntly:
- 🏆 Best-in-class TypeScript Support
- 🚀 Fastest Onboarding with MCP
- 📖 Developer Experience That Just Works
- 🛡️ Production-Ready Reliability
Don't get stuck in 2010, your emails deserve better SDKs!
Ship emails, not infrastructure
Free plan available. No credit card required.
Start sending free